Crochet Patterns

Cosy Winter Hugs

For a while now something exciting has been brewing and today I can finally share that with you.

Cosy Winter Hugs is my latest pattern and is featured on the blog and the fabulous Bella Coco. The pattern can be found here.

This pattern for me is really special. Not only has it been recognised by another crocheter but it was one of the first patterns I designed earlier this year and my first feature. It was inspired by Bella Coco herself. Her tutorial for the Linen/Moss stitch gave me idea for this make. As I’ve said to Sarah-Jayne, “I love nothing more
than a chunky yarn and a simple stitch. Honestly a quick and simple make is what I live for and
this design is no expectation.
.”

This is a super quick make and definitely a go to make for a last minute seasonal make, working up the scarf and ear warmer in an evening. So why not get your super chunky yarn out and give yourself a Cosy Winter Hug this season.

I really hope you love it as much as I do!

Enjoy you’re cuppa,

Hev xoxo

This pattern and images are copyright of Hev’s Home Crochet. You must not sell or reproduce this pattern. Bella Coco has been given permission to share this pattern and images.

Crochet Patterns

Christmas Pudding Fan?

Christmas pudding fan? Even if it’s a huge NO! Just like me, it’s really hard not to find this next pattern super cute! I’ve made a super quick Christmas gift bag make for you to enjoy over the festive season, this is the perfect make for gift giving or even as an alternative to a Christmas stocking. It’s super beginner friendly and obviously uses my favourite stitch, half double crochet (US terms).

So let me give you all a little Christmas gift, the pattern!

Materials

Christmas Pudding Bag

Bag and icing – Aran Yarn 

Holly and berries – DK

6mm  and 5mm Hook

Yarn Needle

Scissors

Abbreviations

This pattern is written in US terminology

Ch- Chain

HDC – Half Double Crochet

DC – Double Crochet

TR – Treble Crochet – Yarn over x 2 

DTR – Double Treble  – Yarn over x 3

SlSt – Slip Stitch

HCDtog – HDC two together

INC – Increase , HDC 2 in the same space.

Rep – Repeat

St(s) – Stitche(s)

MC – Main colour

BC – Border Colour

NC – Nose Colour – Pink

Notes

  • This bag is made up of two panels crocheted together. You will need to make section 1 twice to complete the bag.
  • Using a 6mm hook for the main body of the bag and a 5mm for all features. 

Pattern

Section 1 –  6mm hook, Brown

Make a slip knot and Ch 33

Row 1 – HDC in each stitch to the end, Ch 1 and turn (32)

Row 2 – 25 – Rep row 1 until you have 25 rows of HDC, Ch 1 and turn (32)

Row 26 – HDC in the first 10 Sts, Ch 12 and miss 12 Sts, HDC in the 13th St and carry on HDC for a further 9 Sts until you reach the end of the row, Ch 1 and turn (32)

Row 27 – HDC in each stitch to the end, Ch 1 and turn (32)

Row 28 – HDC in each stitch to the end, Ch 1 and fasten off. (32)

Rep section one again to create 2 bag panels.

Christmas Pudding Features

Section 2 – Working with Aran,white and a 6mm hook.

Icing – 

Make a slip knot and Ch 33

Row 1 – 2 – HDC in each stitch to the end, Ch 1 and turn (32)

Row 3 – HDC in the first 10 Sts, Ch 12 and miss 12 Sts, HDC in the 13th St and carry on HDC for a further 10 Sts until you reach the end of the row (32)

Row 4 – 10 – HDC in each stitch to the end, Ch 1 and turn (32)

Row 11 – HDC in the first st, DC in the next, TR in the next, DTR, TR, DC and rep until end, SC in the last stitch and fasten off. 

Holly and berries, DK, 5mm hook – 

Holly (Green) – 

Make slip knot and Ch 10

Row 1 – HDC into each St, 3 HDC in last st. Continue working on the opposite side of the foundation Ch working HDC in each St around SlSt to first HDC.

Row 2 – *SC, SlSt, HDC, Ch 3, Slst into the first Ch 3 and HDC into the same space as the last HDC*, Rep * one more time.

SC, Slst, SC, Ch 3, Slst into the first Ch 3 and SC into the same space as the last SC.

Rep * twice more to end.

Berries (Red) – 

Make a magic circle, HDC 10 into the circle, fasten off.

Sew Holly and Berries to icing then sew icing to one of the bag panels on the right side.

Section 3 – The Border

Put the panels together with the wrong sides facing. Make a Sc in the corner stitch of the top of the bag. 

Make a Sc in each St along the edge making sure to go through both panels. (Some stitch makers in each of the corners would help to keep the work together and straight).

When you reach a corner make a SC, Ch 2 and make another Sc in the same space and carry on Sc in each stitch along until you reach the next corner, Rep and carry on,

When you reach the top Sc in the last space, Ch 1 and fasten off.

Sew in your ends

Why not share your beautiful work on instagram? Remember to tag me so I can see @hevshomecrochet

This pattern and images are copyright of Hev’s Home Crochet. You must not sell or reproduce this pattern. You may sell items made from this pattern but must credit me as the designer.

Merry Craftmas tea lovers,

Hev xoxo

Crochet Patterns · Guest Feature

Into the new year…2021

Hey Friends,

Happy Monday. The start of another week, you got this! It’s a wet morning here but like so many days at the moment, you get used to it.

I wanted to write today to update you with my 2021 plans for the blog and other socials. I’ve dropped a few hints here and there and if your signed up to my newsletter you’ll definitely know something. You can SIGN UP HERE if you want to subscribe to my newsletter and bag yourself a free PDF crochet pattern while you’re at it. I’m ready to share with you all what’s coming in the near future. So make yourself a cuppa, sit back and relax to find out what’s coming…

2020 has been a year of mixed emotions for reasons that shall not be named and for crochet reasons. I started this amazing blog, I become more present on socials, I started a CAL, I released my first, second, third, four and fifth pattern and you guys have shown me nothing but kindness throughout. You’ve all been so super supportive and I cannot thank you enough!

My dream when I created the blog was simply not to give up on a passion I really enjoyed because I let myself get caught up in everyone else’s world. Hev’s world is actually great and I don’t really know why I wanted to leave in the first place! My dream now has grown and expanded. You’ve all really enjoyed my patterns and mini tutorials and I cannot wait to continue serving up more patterns and crochet fun over the next year.

One of my bigger goals for 2021 is to teach crochet. If 2020 has taught me anything its that running a business online as well as in person is now more important than ever! So I’ve decided to create something really exciting!! A crochet for beginners series on YouTube. I’ve already set up my channel – click here to check it out, I currently have no content but it’s all on the way soon with, fingers crossed, my first video being uploaded at the end of January. I would like to use this space to educate crochet beginners but also share my tips and tricks, lets face it no matter how experienced you are, every one loves a cheat sheet!

Now I know I’ve rambled way too much already but I wanted to update you all on what you can except from my blog and social spaces. I love a small business guest feature, I definitely think I’ve proved that this year, I love sharing everyone else’s works and being part of the community but I’ve decided that I’m about crochet and I want to keep my blog crochet themed so there may not be any features in the same way moving forward. My Instagram will show all the small businesses I love.

So there you have it guys a few of my plans for 2021. I wont tell you everything as I want there to be some surprises along the way but for the time being I’m still learning just like everyone and I’m really looking forward to 2021. I hope you’ll all join me in 2021 and continue this journey with me.

as always, enjoy your cuppa,

Hev xoxo

The images in this post are copyright of Hev’s Home Crochet.

Uncategorized

25 Days of Lockdown Crochet

Lockdown in the UK again… BLAH!

I had planned to wait until next year to start some form of group project but when a second lockdown was announced I decided I didn’t want to hang around and I set up 25 Days of Lockdown Crochet. A small group project that gets people crocheting to help stay positive during this awful time.

Day 1 & 2 Of Lockdown Crochet Image by Hev’s Home Crochet

I wanted to create something super simple that everyone at any level could follow along with and still be unique.

I opted for a striped blanket and double stranded my yarn to make my piece stand out. If you want the full pattern why not join my Instagram group, there are still 17 days of lockdown left, why not use this time to join me! I’ve got a special treat for everyone who’s joined so it’s never to late!

Coming together as a community in a time like this is paramount. I certainly understood what it was like to feel trapped during lockdown #1 and having something like a crochet along to keep my mind focused would have been amazing. Although a project was never far away last lockdown it wasn’t planned and I didn’t have much to keep me in check when I was bored of my WIPs… ever get that feeling?

Day 3 and 4 of Lockdown Crochet Image by Hev’s Home Crochet

As you can see my blanket has no rhyme or reason to it, I call it my ‘ugly’ blanket, but it’s still pretty, wouldn’t you agree? This project is a real stash buster and definitely something I will be encouraging myself to do more when my stash gets too big. My usual go to is to get overwhelmed and sell my yarn but not anymore!!

It’s currently day 9 and everyone is doing such an amazing job so far, I have shared a few examples below of there fantastic work!

Images by Mary Boumaraf, Little Berry Crochet and mystitchingdiary19

I hope this post encourages you to join in and be part of the group. Even if you’re thinking its to late to join and just want to feel like part of the community, send me a message. The crochet chit chat wont end once lockdown ends so why not be apart of the Hev’s Home Crochet community and join in.

See you there, with a cuppa of course!

Hev xoxo

All Images on this post are copyright of owners as tagged and Hev’s Home Crochet. Hev’s Home Crochet has been given permission to use them for illustrative purposes.

Crochet Patterns

Top 5 Free Christmas Patterns

It’s my favourite time of year! I’m always super excited for Christmas and love the holiday spirit. Christmas for me is about lots of food and great company although gift giving and receiving is an added bonus it shouldn’t feel like a pressure. If however you’d like to give a gift this Christmas why not make it? I’m all about a hand made card or present. I love the extra thought that’s gone into it, that means more to me than what any money can buy.

I always try to make at least one of my presents for the holidays and this year so far I’ve managed four! I know, gold star for me, right?! With that in mind I thought you might like to join in the fun and whip up some of your own so below I have rounded up my five go to pattern designs for crochet Christmas makes.


Bella Coco

Sarah-Jayne is my crochet go-to. Her passion to share and educate really resonates with me and it seemed only fitting to share one of her crochet designs first. When I think of crochet gifts I automatically think hats and scarves or jumpers. I know, I know, Granny doesn’t make every yarny gift but this pattern, released earlier this year by Sarah-Jayne is just perfect for anyone. With the pattern being available in 5 sizes, baby through to adult, what’s not to love!

A Crafty Concept

Ashley from A Crafty Concept is definitely a massive inspiration to me with her boho, girl mom designs she is the bobble stitch queen and with an huge array of patterns it was really hard to pick just one but who doesn’t love a stocking full of chocolate for Christmas!

Hev’s Home Crochet

I couldn’t leave one of my own patterns out the mix so why not make the gift of warmth this Christmas with some cosy home decor in the form of my Cosy Cwtch cushion or heat up them toes under Granny’s Woven Throw. You wont be sorry you made it, that’s for sure!

Bag-O-Day Crochet

Crystal is my favourite crochet youtuber without a doubt and her crochet knowledge is second to none, perfect for the visual learner. So if you’re thinking of making a garment this Christmas then stop right here. Men, Women and children; Crystal has a design for them all but what I’m really looking forward to making this year is an oversized cardy, just great for those chilly winter evenings.

Wilma Westenberg

If you fancy a winter accessory then Wilma’s blog is the place for you. Full of wearable pattern designs Wilma’s blog is my go place for shawls and scarves. I wanted to share the first design of Wilma’s I made and one I have gone back to again and again.

There are so so so many more amazing crochet designers out there and but I wanted to give you snippet of just a few I absolutely love to help you get started on your Christmas making whether it be for yourself or someone special.

If making isn’t your thing but you still want to give a crochet gift why not check out a few of the amazing shops listed below and grab some homemade crochet goodies:

Me, Myself and I, Hev’s Home Crochet is taking part in a market night on the 7th November over on the UKcrafters_marketplace Instagram page. I will have a small selection of Christmas goodies and winter warmers on offer including some very pretty baubles!

Makepeacemade – Etsy, Instagram – With an array of festive and playful homeware. Makepeacemade has kindly given us a discount code to use until the end of 2020. Use code AUTUMN10 for 10% off on Michelle’s Etsy shop.

The Fox and Flair – Esty, Instagram – Offering an abundance of sewn good and gift including crochet items perfect for gift giving.

and last but not least,

For Crafts Sake UK – Etsy, Instagram – George has a beautiful selection of crochet baubles and home decor items perfect for Christmas. If you fancy anything from For Craft Sake UK and want 10% off, why not use code HEV10. Who doesn’t love a saving at Christmas!

Enjoy your Cuppa,

Hev xoxo

All Images on this post are copyright of the designers themselves, Hev’s Home Crochet has been given permission to use them for illustrative purposes.

Crochet Patterns

Northern Blossom Baby Blanket

Good morning lovelies!

I’m feeling all the good vibes today and I’m excited to share with you my latest creation which quite frankly I’ve kept you waiting for.

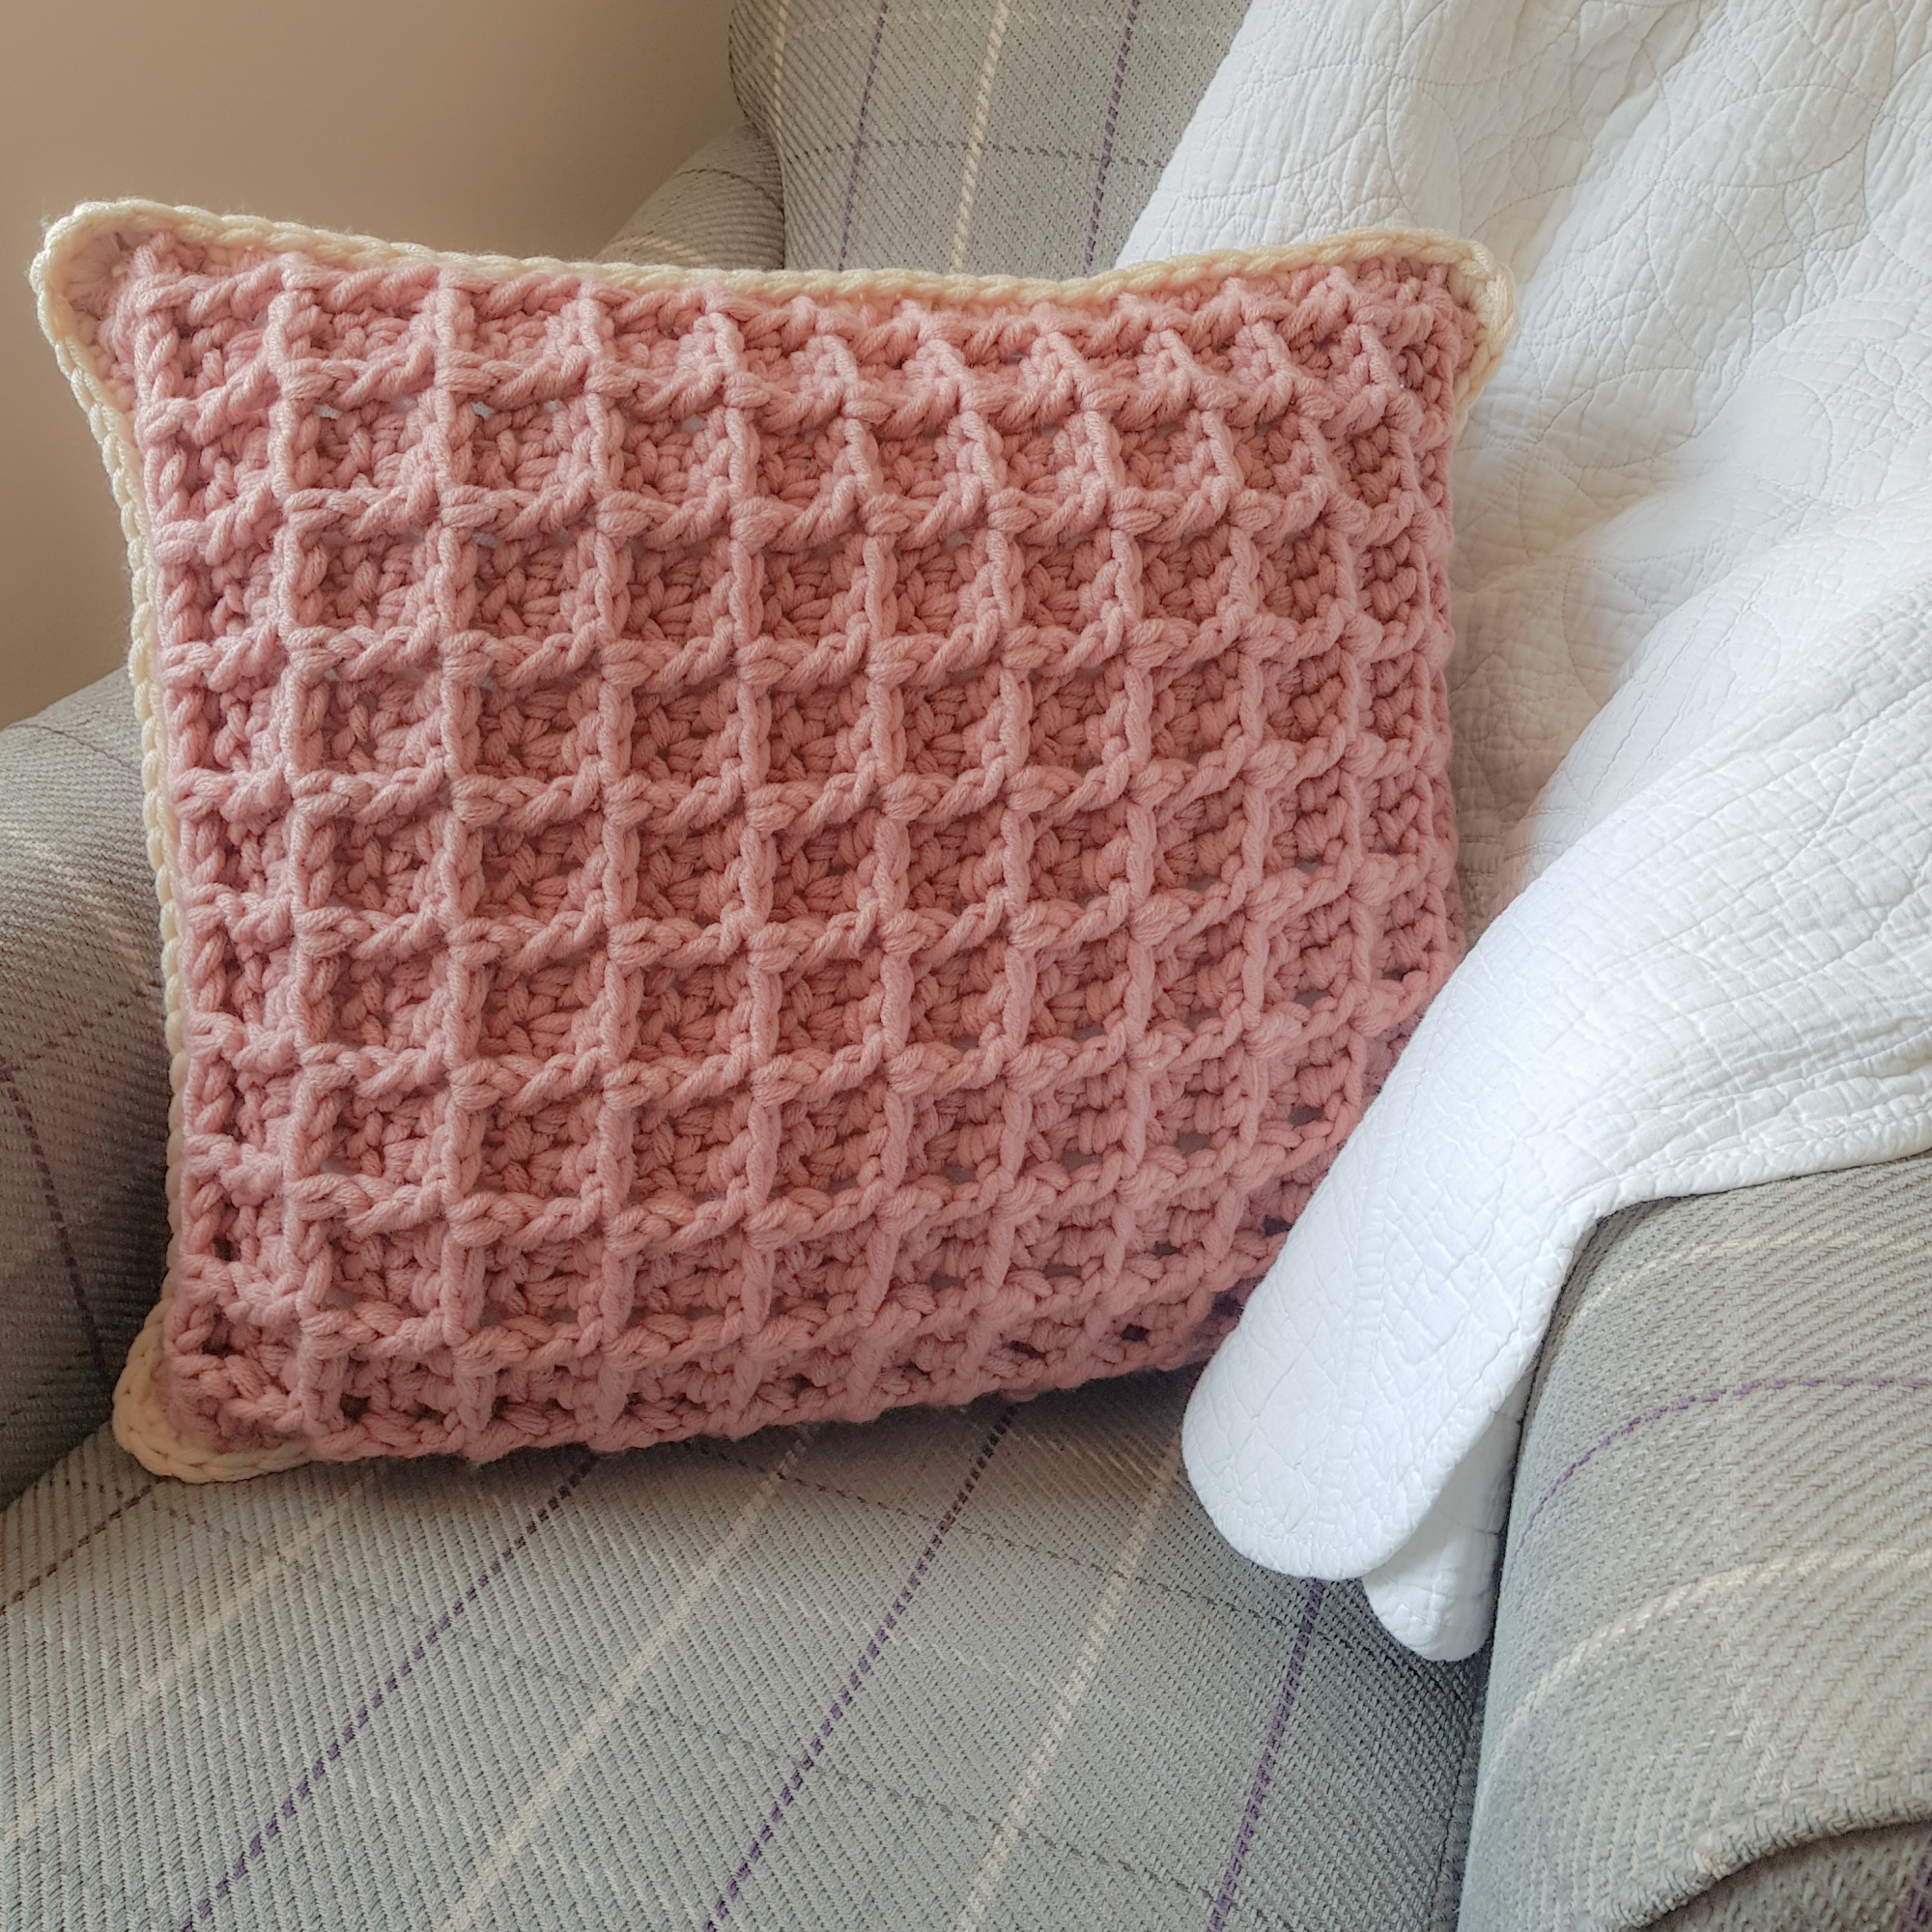
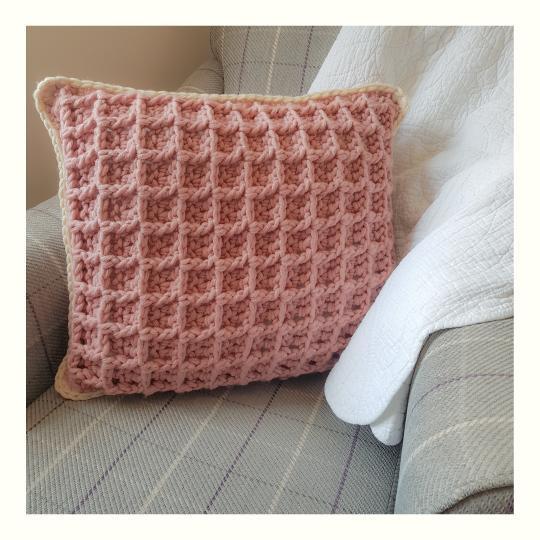
Welcoming my first blanket to the pattern pile, the Northern Blossom Baby Blanket. This has been a pleasure to design and make. I’ve used some yarn that’s been on my list for a while now, velvet. Who doesn’t love a soft to the touch, textured and cosy yarn! I wanted to make a blanket that fitted with the theme of my daughters room, pink and grey, of course. After a play around with what was originally another cushion idea I decided a blanket was more practical for her so I grabbed my hook and yarn and got to work, the Northern Blossom was born.

I’m one of those people who loves a textured stitch, I love a waffle, a bobble, a rib, a cable, a basket weave, seeing the pattern here? This is why for me, this make has all the feels!

Enough of my rambling lets move on to the good stuff… the pattern.

Materials

I used a bulky #5 velvet yarn, a comparable yarn in the same weight would be Bernat Velvet or Crushed Velvet in two colours, I have used pink and grey. You will need 600g in your main colour and a little less than 200g in your second colour.

6mm hook

Yarn Needle

Scissors

Measurements

My blanket measured width 72 x 90 cm height. If your foundation chain measures smaller than 72 cm try going up a hook size to create a bigger stitch.

Abbreviations

This pattern is written in US terminology

Ch- Chain

HDC – Double Crochet

BST – Bobble Stitch – yarn over insert hook into st, yarn over and pull through 2 loops only, rep 4 more times. You should have 6 loops on the hook in total, yarn over and pull through all 6 loops.

Rep – Repeat

St(s) – Stitches

MC – Main colour

BC – Bobble Colour

Notes

  • This pattern is for the advanced beginner.
  • This pattern is worked in multiples of 4 plus 5. (If you want to carry on your chain and increase I reckon this would make an awesome throw!).
  • Chain 1 and turn at the end of every row.
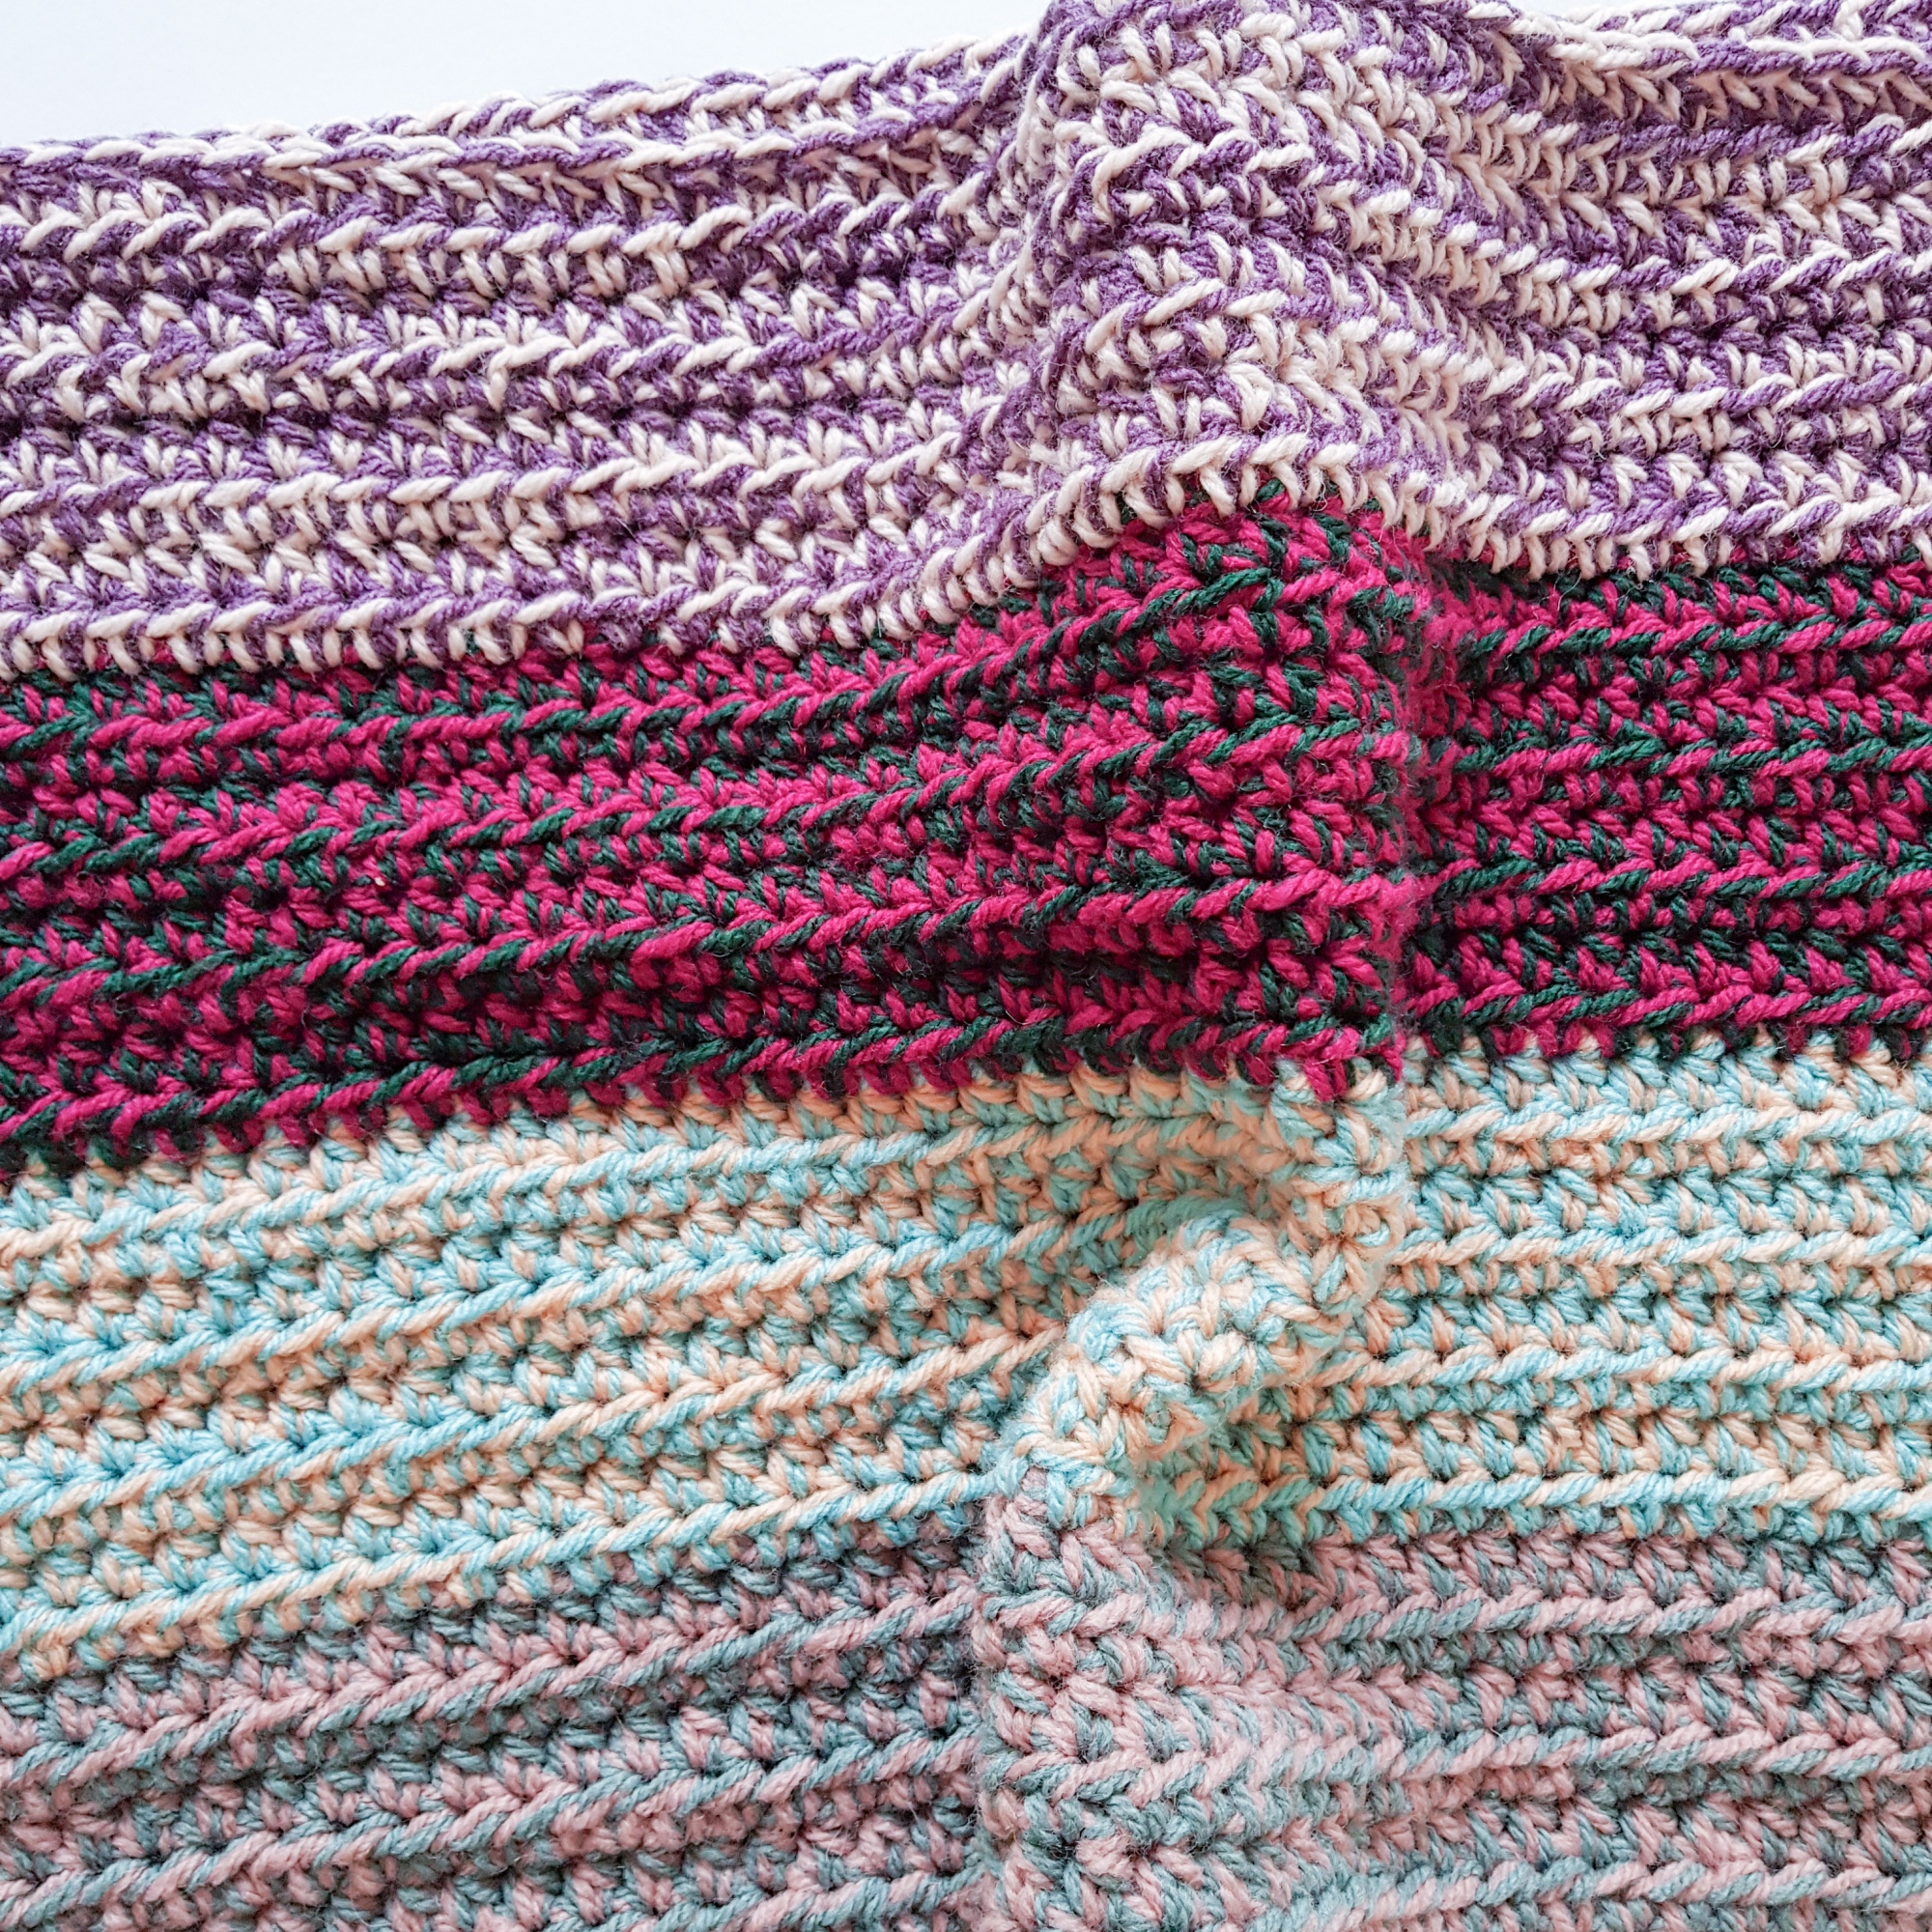
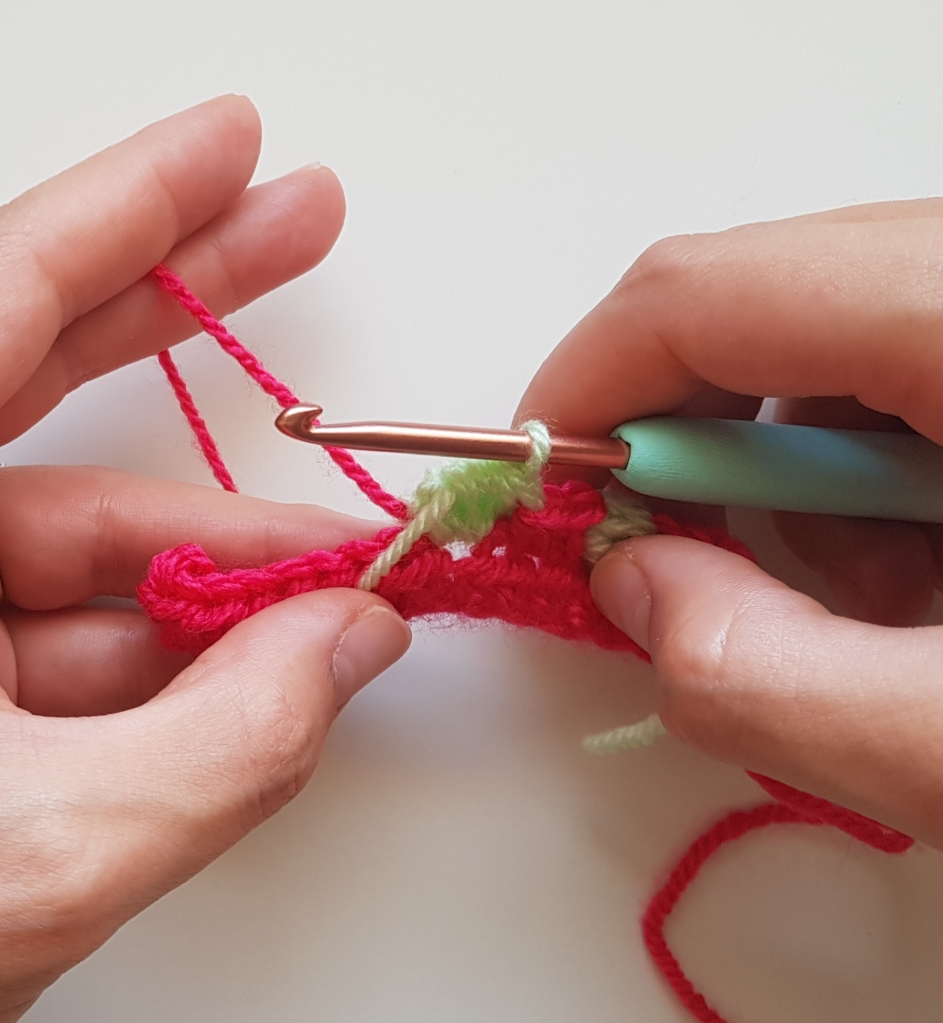
  • Remember to carry your MC with you as you use BC and vice versa on a bobble stitch row. TIP – When you carry your yarn try and carry your BC towards the front of the work and your MC towards the back to make it easier to hide the yarn. See images below.
  • Cut your BC colour yarn at the end of every bobble row, this way you won’t waste too much yarn.

Helpful images depicting how to carry your yarn through this project –

Carry your BC yarn in front of the current row (this is the wrong side of your work) making sure you crochet over it when you insert your hook and yarn over.

Carry your MC behind the current row (on the right side of the work) making sure to insert and yarn over it when you pull up a stitch.

Pattern

Using your main colour create a slip knot and Ch 72 + 5 (77)

Row 1 – HDC in the 3rd Ch from the hook (76) Ch 1 and turn

Row 2 – HDC in the first 3 Sts, finish the last HCD by pulling through all 3 loops on the hook with the BC. BST in the next St, HDC in the next 3 Sts and finish the last HDC in the same way as before, BST in the next St, Rep until the end. (76) Ch 1 and turn

Row 3 – HDC in every stitch to the end (76) Ch 1 and turn

Row 4 – HDC in the first 3 Sts, finish the last HCD by pulling through all 3 loops on the hook with the BC. BST in the next St, HDC in the next 3 Sts and finish the last HDC in the same way as before, BST in the next St, Rep until the end. (76) Ch 1 and turn

Row 5 – HDC in every stitch to the end (76) Ch 1 and turn

Row 6 –  HDC in the first 3 Sts, finish the last HCD by pulling through all 3 loops on the hook with the BC. BST in the next St, HDC in the next 3 Sts and finish the last HDC in the same way as before, BST in the next St, Rep until the end. (76) Ch 1 and turn

Row 7 – 11 – HDC in every stitch to the end (76) Ch 1 and turn

Row 12 – HDC in the first 3 Sts, finish the last HCD by pulling through all 3 loops on the hook with the BC. BST in the next St, HDC in the next 3 Sts and finish the last HDC in the same way as before, BST in the next St, Rep until the end. (76) Ch 1 and turn

Row 13 – HDC in every stitch to the end (76) Ch 1 and turn

Row 14 – HDC in the first 3 Sts, finish the last HCD by pulling through all 3 loops on the hook with the BC. BST in the next St, HDC in the next 3 Sts and finish the last HDC in the same way as before, BST in the next St, Rep until the end. (76) Ch 1 and turn

Row 15 – 21 – HDC in every stitch to the end (76) Ch 1 and turn

Row 22 – HDC in the first 3 Sts, finish the last HCD by pulling through all 3 loops on the hook with the BC. BST in the next St, HDC in the next 3 Sts and finish the last HDC in the same way as before, BST in the next St, Rep until the end. (76) Ch 1 and turn

Row 23 – 53 – HDC in every stitch to the end (76) Ch 1 and turn

When you reach Row 54 we are working the same pattern as above but backwards. Follow the steps below to continue.

Row 54 – Rep row 22

Row 55 – 61 – Rep rows 15-21

Row 62 – Rep row 14

Row 63 – Rep row 13

Row 64 –  Rep row 12

Row – 65 – 69 – Rep rows 7 – 11

Row 70 – Rep row 6

Row 71 – Rep row 5

Row 72 – Rep row 4

Row 73 – Rep row 3

Row 74 – Rep row 2

Row 75 – HDC in every stitch to the end (76) Ch 1 and turn, Ch 1 and fasten off

Why not share your beautiful work on instagram? Remember to tag me so I can see @hevshomecrochet

Why not use the hashtag #hevshomecrochet to show off your work

Copyright

Again its time for the boring bit! This pattern and images are copyright of Hev’s Home Crochet. You must not sell or reproduce this pattern. You may sell items made from this pattern but must credit Hev’s Home Crochet as the designer.